You may, at times, run into strange behavior in your NX model. Boolean will not execute properly, a face rule to pick up tangent faces will not pick up what appear to be tangent faces or body measurements just don’t seem to be correct. You may also notice when you zoom in that you see little spikes or cuts in the model. Sometimes Update Display will correct the visual representation but if the inconsistency remains, there may well be an issue with the geometry.
Step 1: Examine Geometry
Examine Geometry can be used to assist in finding the issues with your model. This tool can be found on your Analysis tab, the far right More pull down, Examine Geometry.
This tool can be used on a fully featured part to show where there may be inconsistencies or other body and face issues or on an unparameterized (dumb) body. The repair functions will be different depending on the need to maintain your feature tree or if it is OK to wipe out the parameters.
To use the tool, use the Command Finder to find Examine Geometry. You can then Set or Clear all of the checks as you like. Select the faces of the body that you want to examine or Ctrl+A to select all faces of the body. Once geometry is selected for examination, the Examine Geometry button becomes available, Click this button.
Adjust the Distance and Angle tolerances as needed.
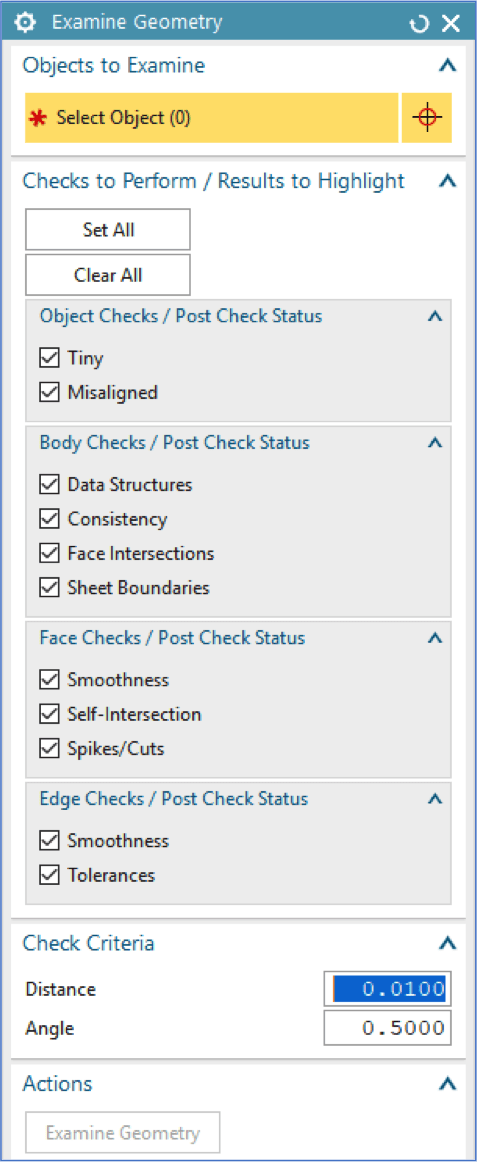
The Examine Geometry button shown once it becomes available:

Depending on the complexity of the model, it may take some time to complete the analysis. This example has 63,321 objects selected, and this analysis took about 90 seconds to complete. As they say, your mileage may vary.
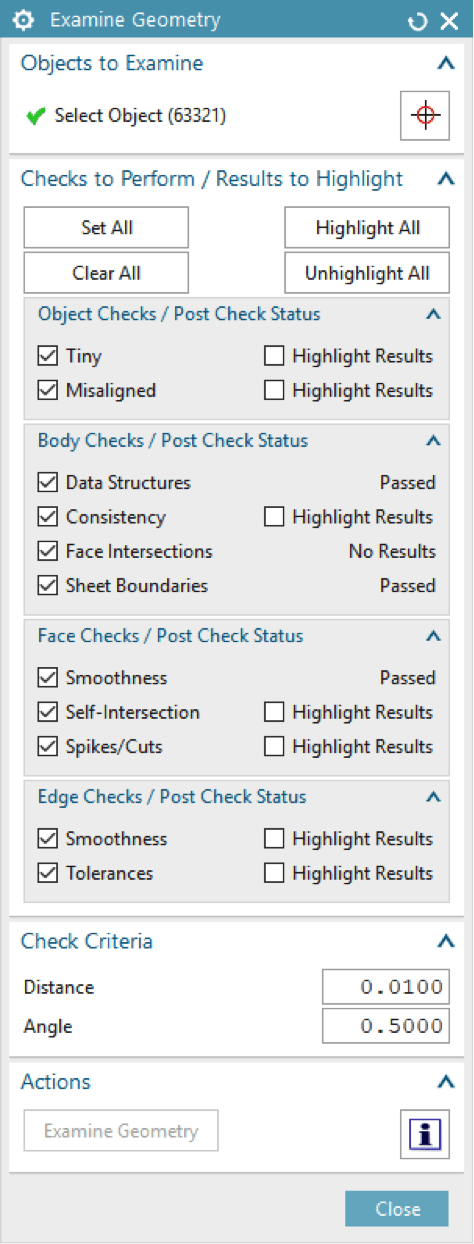
Once completed, you can check On/Off the Highlight Results option to visually see the locations of the checks.
Tiny Face example here:
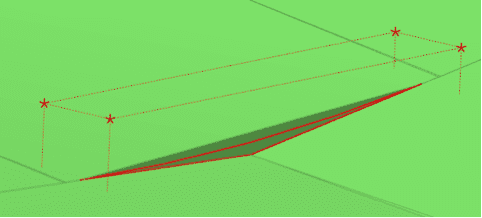
“Tiny” looks at bodies, faces, edges and curves. The tool builds a bounding box around the object and if the diagonal length of the box is less than the specified tolerance, it’s flagged. Look to documentation for deeper explanations of the different checks.
Click on the Information icon  to see a detailed report of the findings.
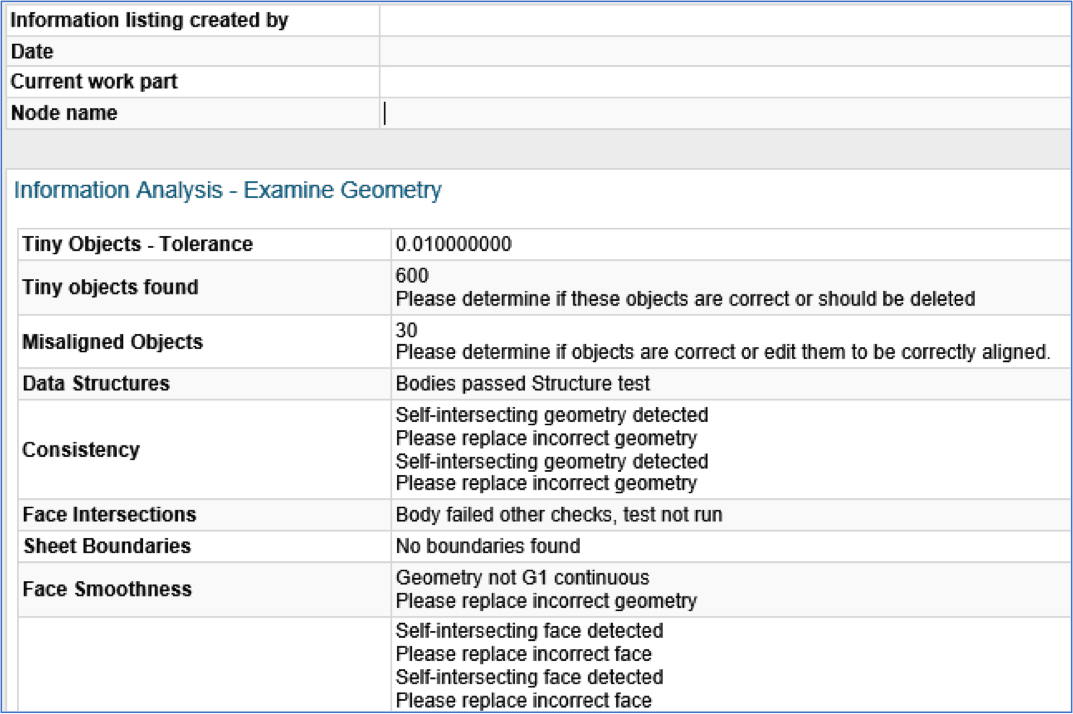
The Examine Geometry tool analyses solid bodies, faces & edges of interest. However there are no automatic repair functions to correct these conditions. The Highlight Results is available to assist you in fixing them yourself.
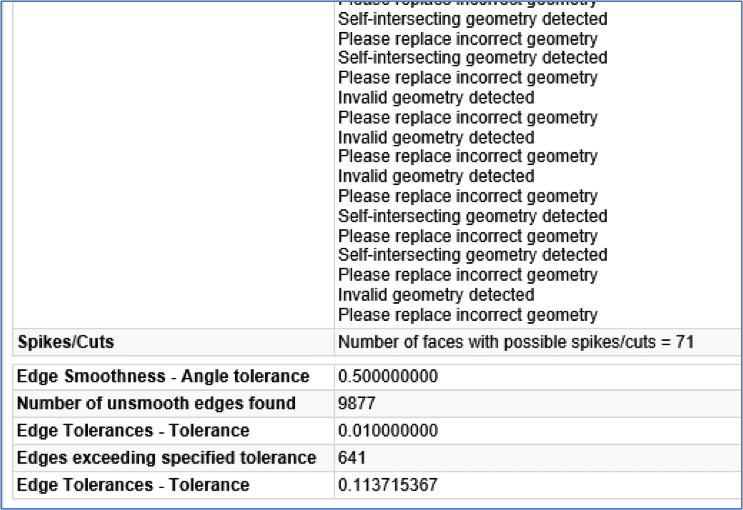
For a fully featured model, where it’s desired to maintain the history of the part, editing features or rebuilding the geometry is the way to go.
Step 2: Heal Geometry
If the part you are examining is an unparameterized or dumb body or if removing parameters from the part is not a concern, Heal Geometry is for you.
To access the tool, navigate to File > Export > Heal Geometry.
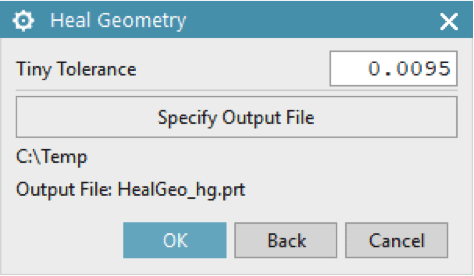
With this tool, you can specify the Tiny Tolerance (explained above). The tool will automatically pick up the location of the part file and provide a new output name appended with _hg. You can Specify Output File and change the location and file name of the exported geometry.
Heal Geometry will sometimes fail to produce an output file. In this case, look to your NX Logfile to see the errors captured. The difference between a successful and a failed export could be in how the part was translated into NX or out of the native CAD system. Trying different neutral file formats may work as well. Parasolid & STEP being the most common. Also, NX has the ability to open these files directly OR use File > Import (Parasolid or STEP). If the geometry is particularly finicky, trying different approaches may get you the results you’re looking for.
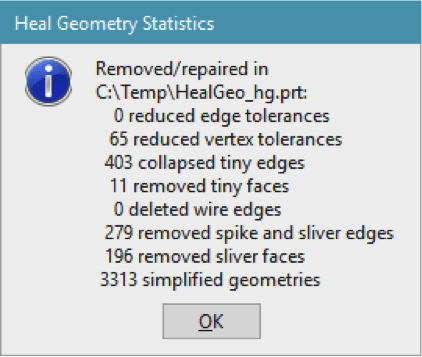
Once completed, you will get a window showing Heal Geometry Statistics. In this example it cleaned up quite a few objects making the model more stable and easier to work with.
Step 3: Re-examine Geometry
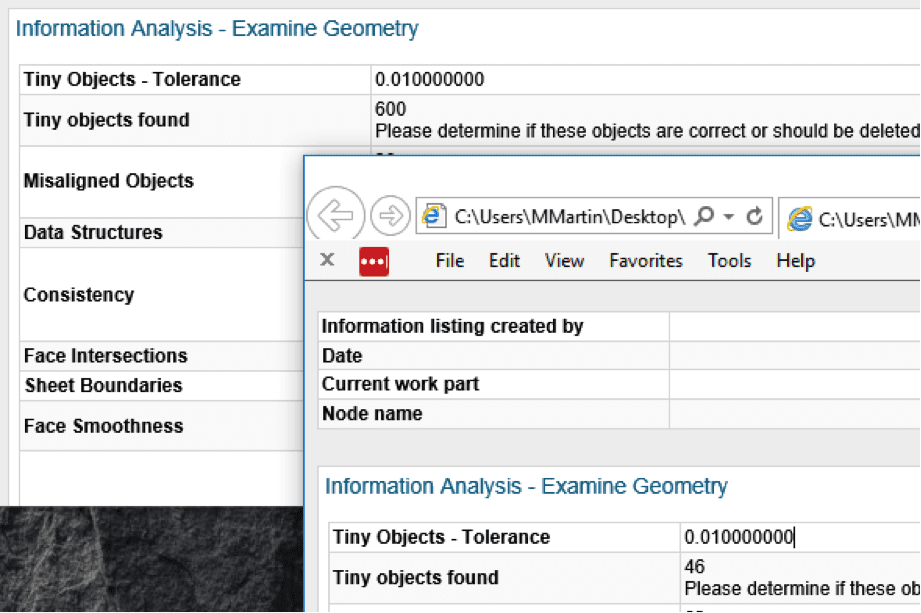
Navigate to your export directory and open the _hg.prt file to re-run Examine Geometry. This example reduced the Tiny objects from 600 to 46. Try exporting the original file with a lower Tiny Tolerance for different results.
